Boost Your Productivity: 7 Essential Mac Must-Haves That Will Make Life Easier

Greetings, MacBook enthusiasts! Welcome to my digital hub where I’m all about optimizing your MacBook experience for maximum productivity and comfort. Whether you’re a seasoned user or just unboxing your shiny new MacBook, I’m here to sprinkle some digital magic into your world.
In this blog post, I’m delving into seven essential strategies to enhance your MacBook experience while boosting your productivity. From leveraging the Bookmarks Bar for efficient digital organization to safeguarding your files with Time Machine Backup, I’ve curated a collection of tips and tools that’ll revolutionize how you use your beloved Macbook. But that’s not all! I’ll also explore how apps like Notion and Google Calendar can boost your workflow, along with savvy tricks for customizing your desktop wallpaper and harnessing the power of Hot Corners. And because I believe in going the extra mile, I’ll even discuss must-have hardware accessories that’ll elevate your MacBook game to new heights.
So, grab your favorite beverage, settle into your favorite spot, and let’s embark on a journey to make your MacBook experience both cozy and efficient.
1. Bookmarks Bar
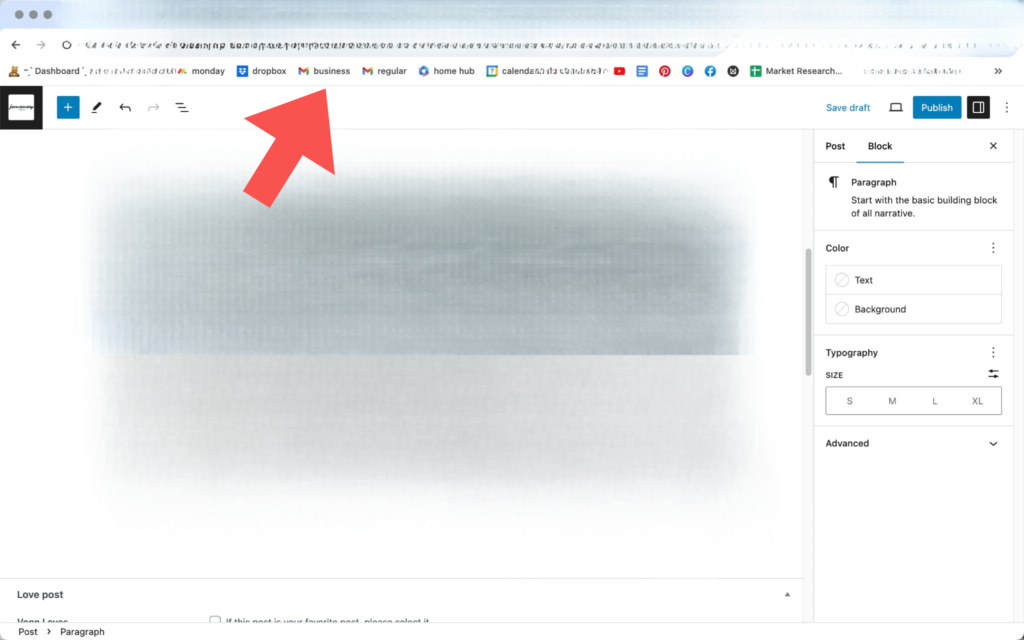
Bookmarks are necessary for swift access to sites that contribute to your productivity and creativity. Whether it’s emails, creative hubs, workspaces, educational platforms, or favorite recipes, organized bookmarks ensure you never lose track of valuable resources. By organizing your bookmarks effectively, you can streamline your digital experience and maximize efficiency!
Don’t forget to bookmark any site by simply clicking the star icon in the address bar. Create concise titles for clarity or delete titles for streamlined icon viewing!

2. Time Machine Backup
Time Machine Backup is a crucial tool for Mac users looking to safeguard all their data, including files, apps, and system settings. Especially for those using their Mac for essential tasks like school or work projects, access to files is paramount. However, storing all data locally can quickly consume storage space, which is precious on your Mac.
You can optimize your backup strategy by using Time Machine Backup alongside Optimize Mac Storage, ensuring your data is accessible both locally and in iCloud.
Here’s how it works: when downloading a file, it’s initially stored locally. Optimize Mac Storage kicks in with older or infrequently accessed files, moving them to iCloud to free up space on your Mac. While files remain visible in folders, they’re not physically present until accessed again. This setup ensures 100% file backup to Apple’s servers, with recently accessed files stored locally. It’s crucial to enable Time Machine Backup first to back up everything, then enable Optimize Mac Storage. Time Machine ensures access to data whenever needed. In the end, the decision to enable Optimize Mac Storage to offload files to iCloud, knowing they’re accessible through Time Machine Backup, is yours to make.
Things to note:
- Using Time Machine Backup alone keeps files stored locally on your Mac’s internal drive, using drive space. You can also save data on an external drive attached to your Mac, or opt for iCloud if you prefer cloud storage for Time Machine Backups. It’s advisable to back up your files to a location separate from your internal disk.
- With Optimize Mac Storage enabled first and data offloaded to the server, enabling Time Machine Backup after won’t back up already offloaded data not present locally. That’s why I recommend enabling Time Machine Backup first, preventing data loss if your device breaks or is stolen.
When uncertainty strikes, Apple Customer Support is your guiding light!
3. Notion
Are you drowning in a sea of journals with scattered thoughts and ideas? That’s okay; many of us are! But let me introduce you to Notion—a game-changer for organizing my mind.
With Notion, I’ve found a single place to gather all my thoughts and ideas, keeping them fresh and accessible. Whether brainstorming blog post ideas or delving into deeper topics, revisiting my Notion pages sparks new insights and content ideas. Not only is Notion perfect for content creators with its versatile design options, but it also helps tackle various aspects of life.
From a well-designed Dashboard to detailed Calendars, Bookshelves, Dream Logs, and Workout Plans, Notion caters to all needs. It’s become my go-to app for keeping my brain calm and satisfied. Plus, the ability to add playlists to any page? Pure genius. I highly recommend diving headfirst into this app and learning the many ways you can customize Notion to meet your every need.

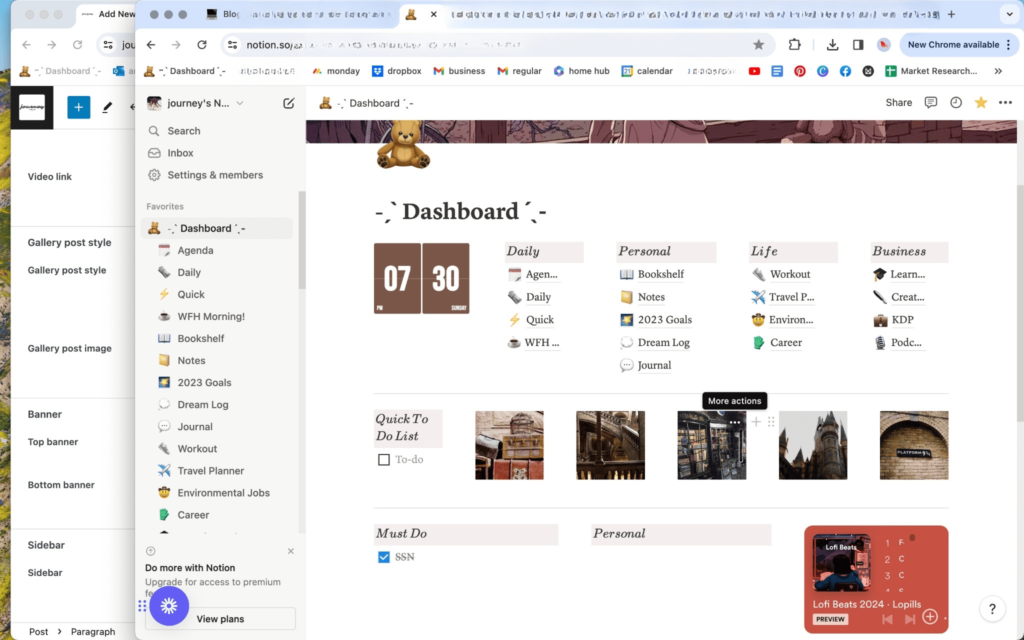
This is what my Notion Dashboard looks like! I personally think it’s a work of art. Have you already discovered Notion? If so, what are your favorite features? I love the analog clock widget that I downloaded from Indify.co.
4. Google Calendar
Everybody needs a calendar! One of my favorite yet simple features of Google Calendar is color-coding calendars or events. If you’re like me, visual cues are essential for staying organized and reducing overwhelm. Color-coding creates a clear separation between aspects of life, making it easier to manage schedules. Use different colors for different event categories, such as work, personal, or social commitments, to identify priorities at a glance. Plus, did you know you can share your calendar with others? It’s a great way to coordinate plans and stay connected.
But there’s more! Google Calendar offers powerful tools to streamline scheduling. With customizable views, choose how to see schedules—by day, week, month, or agenda. Integration with Gmail and other apps simplifies scheduling, creating events from emails or collaborating seamlessly. Set reminders and notifications to never miss an appointment or deadline. Don’t forget about recurring events—whether a weekly meeting or monthly appointment, Google Calendar has you covered. Attach files or documents to events, keeping all information in one convenient place. With these features, Google Calendar becomes not just a scheduling tool, but your personal assistant.
5. Customize Your Wallpaper using Canva
Changing wallpaper breathes new life into MacBook experience. Switching it up every month adds fresh aesthetic appeal and motivates me to use my MacBook more! Create unique wallpaper using Canva. Select the custom design size of 1280 x 800px and unleash creativity. Create a vibrant collage using JPEG or PNG images you can find on Google or Pinterest for loud wallpaper reflecting your style.
Alternatively, make it functional by incorporating space for desktop folders, a note space using “Stickies” app for quick notes, a monthly calendar for overview, and cute photos or digital stickers to tie everything together. There are dozens of tutorials you can find on Youtube that walk you through this process.
Spending time on this creative endeavor is something I truly enjoy. An extra step you can take is setting an accent color that compliments your wallpaper theme for cohesion. Go to System Settings>Appearance and choose a color that suits your aesthetic! Investing time in creative workspace boosts motivation and productivity—simple yet effective.

6. Hot Corners
Hot Corners are secret shortcuts, unlocking efficiency and convenience on your Mac. Beyond desktop or quick notes access, possibilities are endless!
To set up Hot Corners, navigate to Apple Menu>System Settings>Desktop & Dock>Hot Corners (bottom right.)
Imagine summoning your favorite productivity app, launching a quick search, or initiating a screen capture with a mouse flick, all without lifting a finger from your keyboard. Save time, streamline tasks, and optimize workflow. I have Quick Note set up for one of my Hot Corners, which I find is great for jotting ideas down on a whim!
Set hot corners to open your email inbox, activate a timer for Pomodoro sessions, or toggle full-screen apps with ease. Explore your options and customize hot corners for unique workflow—you’ll wonder how you lived without them!
7. USB Dock
Last but not least, a USB dock can connect an extra monitor, separate keyboard, and mouse to your MacBook along with other accessories. Essential for extensive MacBook use, it improves productivity by offering expanded connectivity options.
Using an actual mouse reduces hand strain from prolonged trackpad use, and additional monitors provides space, especially with a 13” MacBook. This streamlines workflow and increases productivity by multitasking more efficiently.
A USB dock simplifies setup, providing a single connection point for all devices, reducing cable clutter and enabling easy workstation switching. Its portability also allows me to enjoy the convenience of a portable laptop while still having access to a wide range of peripherals, enhancing flexibility and adaptability in various work environments.
When investing in a USB dock, ensure you choose one with the correct plug-in for your MacBook, with essential ports like USB-C, HDMI, USB, and a headphone jack as well, if that is necessary for your experience. Prices vary, but I found the J5 Create dock at Best Buy for about $37, and it has perfectly met all my needs. Be sure to read reviews before making a decision!
And with that being said…
Thank you for joining me on this journey to enhance your MacBook experience! I hope these tips and tricks have inspired you to cozy up to your MacBook and unlock its full potential. Remember, by implementing these strategies, you can create a workspace that not only boosts productivity but also sparks creativity and joy. Here’s to seamless workflows, organized desktops, and endless inspiration!
For those embarking on their MacBook improvement journey, I wish you the best of luck. May your digital world be filled with cozy corners, efficient shortcuts, and endless possibilities. Happy exploring, and until next time, stay inspired and productive!
And remember, this is just the beginning! Be sure to explore our website for more insightful posts and valuable tips to elevate your productivity and streamline your digital life. Don’t forget to bookmark our page and come back for more inspiration in the future!
I am not sponsored by or affiliated with any applications or companies mentioned in this article.


Thank you so much! This was very informative. I enjoyed the wallpaper canva section and will soon be making some!
Very detailed and easy to follow! Thank you!
Test message
Just got a new MacBook and this helped out so much
You are awesome Journey ❤️
Loved this! Such good tips that I’ll be using.
So helpful! Looking forward to more content!
So informative and helpful!
Loved these. MacBooks are a wonder and these tips really help with efficiency!
icpljm
zyl3va
4sz32h
jvk8zk
nwyq3n
kdcpfd
mj04a2
by1eri
faocpy
sbseg8
4ui1zh
esfhym
dzwd2q
sy7avg
u25egs
p0eo47
zkiblu
wlcuuj
Very interesting and informative content! I always find this
site reliable and full of valuable knowledge.
h4y57q
s4cg2y
ivqmhe
opiatj